
Share This:
It’s embarrassing to say this, but I remember telling a parent she shouldn’t tell her child to sound out words they didn’t know when they were reading. I explained that we want to look at multiples ways to figure out a word–looking at the first letter and getting our mouths ready, looking at pictures, skipping and coming back, or guessing the word.
I wish I were lying. But it was all I had known, and I was doing what I thought was best to help children become readers. You see, learning to read was easy for me. I was a great reader as a child, and would read a book every day or two. I found books that I loved, and reading became an integral part of my life. Learning to read felt as easy as learning to breathe.
So I thought that’s how all children learned. They just needed to find something that interested them, and the rest would happen as if by magic. I was so, so wrong.
Yes, some children learn to read like I did. But a large portion of our children will not become proficient readers without explicit, systematic phonics instruction. And for children who are struggling, we need to give them an intensive dose of phonics intervention in small group.
Below, I’ll walk you through the steps of my lessons for phonics intervention. We move through warmups, and review before finally introducing and practicing a new rule. In several years as an interventionist, I have seen the power in incorporating these steps. While these steps are used with my phonics intervention students, all components can be used for students on grade-level, as well as in a whole-group setting. Explicit phonics instruction, after all, benefits all.
I used to spend about 5 minutes of my phonics intervention lessons on oral-only phonemic awareness activities. Now, however, this is a very small portion of my lesson, if I include it at all.
Phonemic awareness instruction is more powerful when it is coupled with letters. The evidence is clear on that. If your students know their letter sounds, there is no reason to have prolonged oral-only phonemic awareness activities. We don’t need to go through 8 different skills and spend 10 minutes on phonemic awareness that is disconnected from text.
Instead, try taking 1-2 minutes to practice segmenting and blending phonemes that align with the instruction you are teaching. For example, if you are working on blends, you could find some 4 sound words and ask children to segment and blend (I created lists where the words are organized according to both phoneme and skill). It can truly be that simple.

Eventually, I eliminate a disconnected phonemic awareness activity altogether, and instead only incorporate phonemic awareness activities into the lesson itself.
The salmon and white cards, also known as a symbol to sound or a flashcard deck, is like flashing abc cards to students, but instead includes all the skills you’ve taught. It’s an easy, quick activity, but one that is vital. The salmon and white cards are a chance for students to review the graphemes you have taught them. You flash the grapheme cards, and the student tells you the sound associated with that grapheme. For example, if I showed “ai”, the children would say “a.” If I showed “igh”, they would respond with “i.”

At the beginning of each lesson, flash through the grapheme deck to give students a quick warm-up at the sound level.
If a child cannot write their ABCs easily and without a visual aid, then they are not proficient with the alphabet. Writing the ABCS is a way to warm students up for writing and a great time to remind students of proper letter formation.
Two important considerations when doing this. One, students should do it lowercase. Why? 98% of the letter we write are lowercase. I want my children to write lowercase letters correctly, quickly, and efficiently. Another consideration is to have students write their ABCS a-m on one line, then n-z on the next. By doing this, there are an equal number of letters on the top and bottom. It makes it easy to see if a letter is missing.

I give my students 2 minutes to start. Wherever they are at by the end of the 2 minutes is where they are for the day. Once everyone has mastered the alphabet in 2 minutes, we move down to 1 minute 30 seconds, then 1 minute, and finally 30 seconds. My goal is for my students to be able to write the alphabet in 30 seconds or less.
Sound to symbol is the opposite of, you guessed it, symbol to sound. Instead of displaying graphemes to children, we give them a phoneme and they have to write down the graphemes they know that make those sounds. You only do what you have taught up to that point.
For example, I might ask students to write down the 4 ways to make the /a/ sound. There are more than 4 graphemes that make the /a/ sound, but we are only having students write what has been taught to that point.
Other examples:
The next component of a phonics intervention lesson is review. Cumulative review is of critical importance. Children should not just practice the “skill of the week.” Instead, they need to learn how to incorporate their new learnings with the previous lessons.
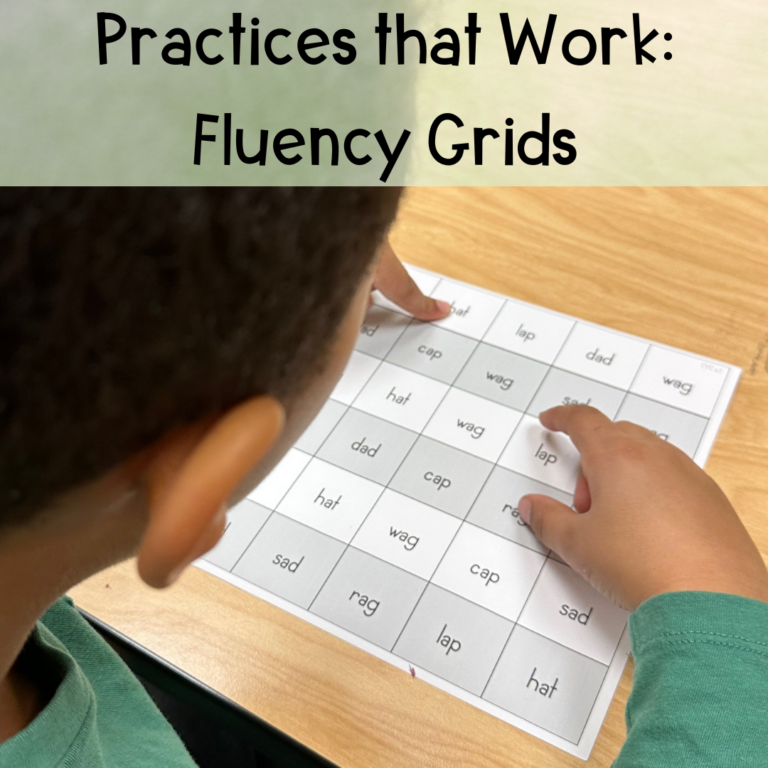
There are a few ways you can review reading. If you put together decodable folders, you can ask your students to read from it for several minutes while you listen in. You can use fluency grids as a quicker option.
One of my favorite ways to review is with review PowerPoints. When I was an interventionist I typically had between 8 and 10 groups of students. It just wasn’t feasible for me to put together physical decks of review words for all of those groups. Instead, I created PowerPoints with over 1,700 words. Every time I teach a new skill, I simply add some of those words to our PowerPoints.
You do not want to stop after each word, but stop at several strategic points to ask students questions tied to the skills they’ve learned.
Example prompts:
We can’t forget to review both the reading and spelling of new words. Poor spelling comes from not being taught how to spell in the first place, but can also happen when we don’t give children time to practice and internalize the skills we have taught them. You can take the words you had in your deck for review reading and use those, or come up with new ones. I got tired of googling words each week, so I made my own.
This is a great time to use the practice of sound-symbol mapping, where you help students map one sound to the symbol that represents the sound. I always make students repeat the word and say the sounds as they are spelling. The important thing to remember is that 1 box = 1 sound, no matter how many letters are in that sound. This helps students to recognize graphemes.

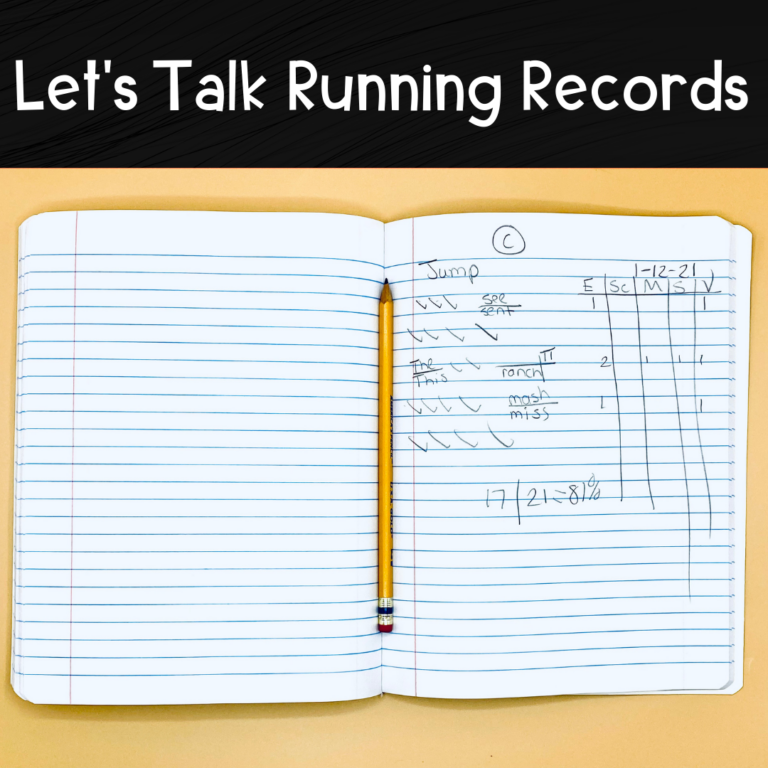
There are many ways you can practice reviewing spelling. Dictation in a composition book is powerful, effective, and takes very little extra energy. You can use sound boxes (like the ones above), dry erase boards, sentence strips, or even go crazy and write in shaving cream. Just make sure you are giving children enough practice in both new and learned skills to reach automaticity.
To introduce a new skill in my phonics intervention groups, I start by connecting phonemic awareness and phonics. I will often start with just the sounds and have students pay attention to the target phoneme(s) I am addressing. For example, If I am teaching about ch vs. tch, I would have students say and tap several words with those sounds.
After we discuss the sounds, it is time to explicitly teach students the rule. To continue with my ch vs tch example, I would teach them that we use the “long spelling right after short vowel.” I would put the grapheme on the board, and walk through several examples where I model reading and spelling. We then need to spend time practicing together. (It’s giving “I do, we do” vibes, right?)
I use a phonics notebook to help practice our new skills. It is a quick, efficient record of what had been taught. After we complete our notepage, we will move on to reading and writing words and sentences with those patterns. (More guided practice)

I want you to remember this when you are teaching a new skill: it’s okay to follow a routine and not spend hours creating elaborate lessons around a rule. Explicitly explain the rule, and then give them opportunities to hear and see that word in multiple contexts. You do not need children to create elaborate crafts or projects. Many of the crafts I see are heavy on the craft side, but extraordinarily light when it comes to practicing phonics skills.
We want to ensure that whatever skill we are teaching, students have time to work with that skill in a text. This is why decodables are so important. Before, when I was living in the guided reading/balanced literacy world, I would teach a phonics skill and then flip over to our leveled text where they might have 2-3 words that follow the pattern I’ve taught. How were they ever supposed to learn a new skill like this? Now, I give them decodable texts that include tons of examples of the skill they have learned. Especially for students in a phonics intervention, giving them the amount of time they need to reach automaticity is key.
Before we read the text, if it is one that I have printed, we highlight words with the target grapheme (ex: if we are studying r-controlled vowels, we highlight all the r-controlled vowels.) Then, we read only the highlighted words. Finally, we read the text itself. Children should have high success with the text. The decodable should be full of words they already know. The words that were highlighted should be one of the only unfamiliar ones, and by practicing those beforehand, we have taken most of the cognitive load away from them. My favorite printable decodables are from Emily Gibbons at The Literacy Nest. Hers are truly decodable and affordable.
Another part of my instruction is teaching heart words. There are many high-frequency words that can easily be decoded—I do not focus on teaching those words. Instead, I aim to teach 3-5 high-frequency words each week that are phonetically irregular in some way. I use the heart words approach, which you can learn more about here. Teaching heart words is only a couple minutes of my day.
This phonics intervention lesson was, to say the least, hefty. Just know that you will do all of the right things, and you will still have lessons where you forget things. No amount of planning can ever prepare us for real life. I mess up all the time, I forget things, I’ve instructed wrong and had to go back and say “Sorry guys, what I told you yesterday wasn’t quite right.” We are always striving to be better, but I hope you will give yourself grace and acknowledge that what you are right now is good enough.
At its crux, this lesson is about giving children the explicit instruction they need to acquire phonics skills, and then allowing them enough time and repetitions to practice to automaticity. Because it is not a love of reading that teaches children how to read. Instead, it is when children have the ability to read that loving it becomes a possibility.
Share This:

Savannah Campbell is a K-5 reading specialist. She has taught her entire 12-year teaching career at the school she went to as a child. She holds two master’s degrees in education from the College of William and Mary. Savannah is both Orton-Gillingham and LETRS trained. Her greatest hope in life is to allow all children to live the life they want by helping them to become literate individuals.
Savannah Campbell is a K-5 reading specialist. She has taught her entire 12-year teaching career at the school she went to as a child. She holds two master’s degrees in education from the College of William and Mary. Savannah is both Orton-Gillingham and LETRS trained. Her greatest hope in life is to allow all children to live the life they want by helping them to become literate individuals.
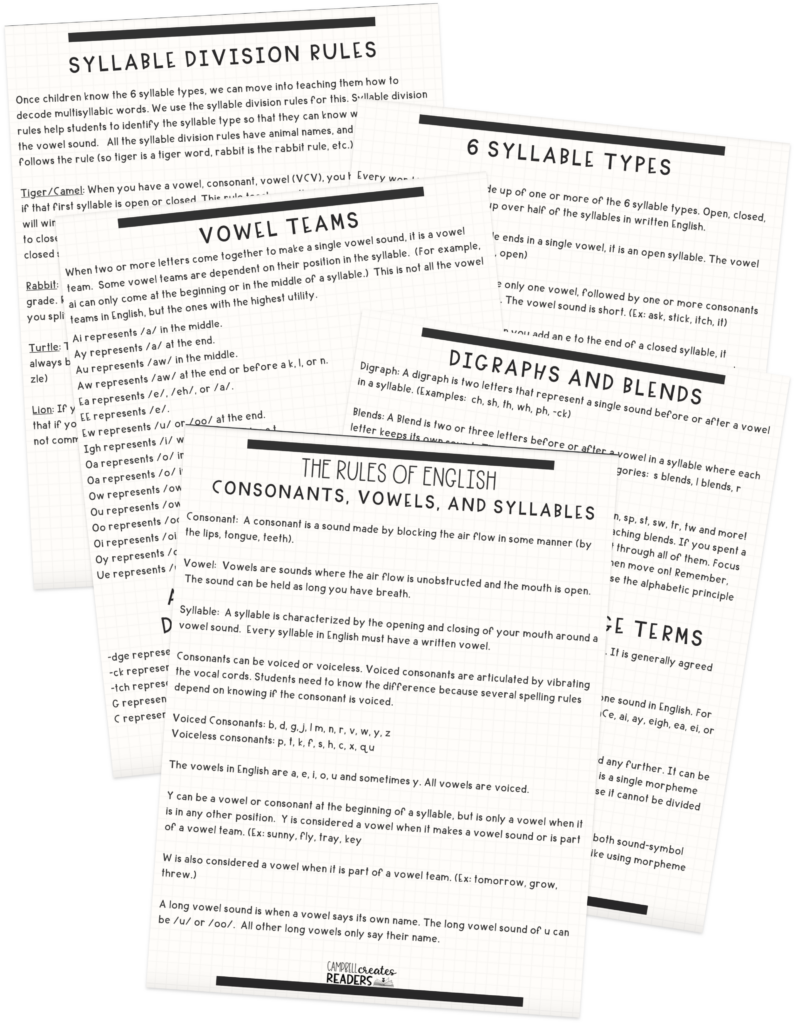
Feeling overwhelmed with all the terminology out there? Want to know the key terms all teachers need to teach phonics? In this FREE Rules of English cheat sheet, you get a 5 page pdf that takes you through the most important terms for understanding English—you’ll learn about digraphs, blends, syllable types, syllable divisions, and move. Grab today and take the stress out of your phonics prep!